

Reverse osmosis (RO) is one of the most effective point-of-use filtration technologies available, capable of removing up to 99% of dissolved solids and contaminants. Whether you’re in the market for your first RO- reverse osmosis system or looking to upgrade, here’s a complete guide to help you choose, install, and maintain your unit.
1. How Reverse Osmosis Works
Pre-Filtration
- Sediment Filter: Captures sand, rust, and particulates down to 5 μm.
- Carbon Filter: Adsorbs chlorine, chloramines, and organic compounds—protecting the RO membrane.
RO Membrane
- Semipermeable Barrier: Under pressure, water molecules pass through while rejecting dissolved salts, heavy metals, nitrates, fluoride, and more.
- Rejection Rate: Modern membranes remove 95–99% of total dissolved solids (TDS).
Post-Filtration & Polishing
- Carbon “Polishing” Filter: Improves taste and odor by removing any residual contaminants.
- Optional Remineralization: Restores healthy minerals (calcium, magnesium) for balanced pH and taste.
Storage & Delivery
- Pressurized Tank: Stores filtered water, ensuring immediate access.
- Dedicated Faucet: Separates RO water from your main tap.
2. Key Benefits
Superior Contaminant Removal
Effectively reduces lead, arsenic, chromium, fluoride, nitrates, sodium, and more.
Improved Taste & Clarity
Eliminates off-tastes and odors, yielding crisp, clean water for drinking and cooking.
Health & Safety
Protects against heavy metals and chemical contaminants linked to long-term health risks.
Cost-Effective
Replaces bottled water for a fraction of the price—roughly $0.05–$0.10 per gallon of filtered water.
3. Considerations Before You Buy
Factor What to Look For
- Flow Rate & Recovery Aim for ≥ 50 gallons/day capacity and ≥ 3:1 recovery ratio (waste:filtered).
- Membrane Quality Look for NSF/ANSI 58 certification.
- Filter Lifespan Sediment & carbon filters usually 6–12 months; membranes 2–3 years.
- System Footprint Under-sink vs. countertop models; tankless designs for space savings.
- Installation Complexity DIY kits vs. professional installation; check for all accessories.
- Additional Features Built-in booster pumps, leak detectors, automatic shut-off valves.
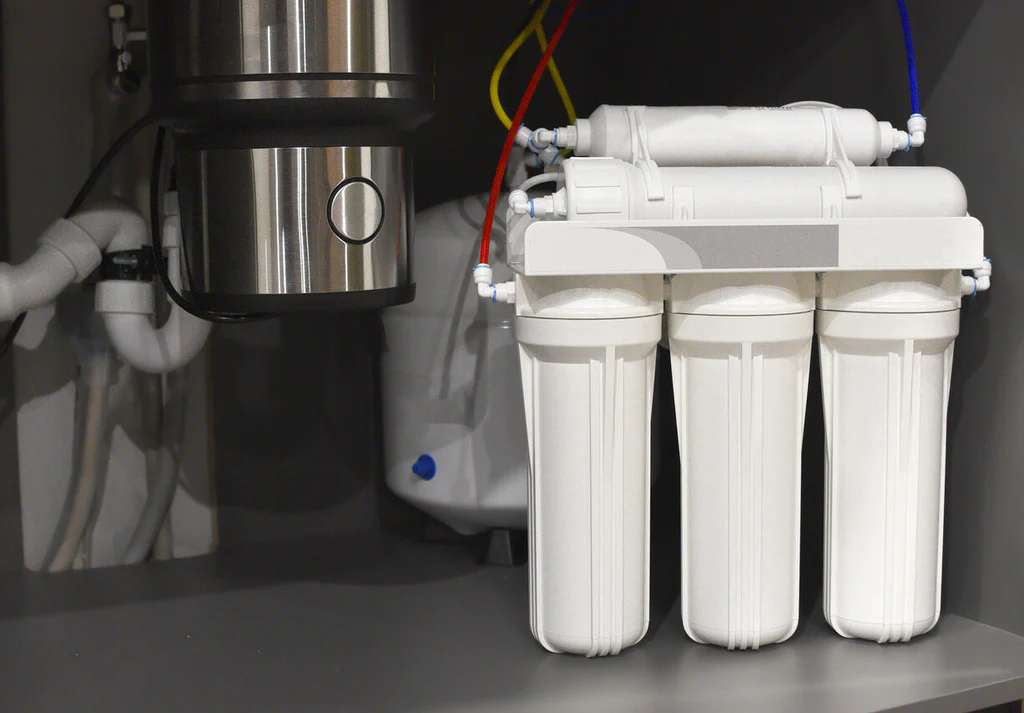
4. Installation Overview
Shut Off Cold Water Supply
Mount Filter Assembly
Pre-filters and RO membrane housing beneath the sink.
Connect Drain Line
Saddle clamp on existing drainpipe.
Install Storage Tank & Faucet
Drill a 1 ¼″ hole for the dedicated faucet (if none exists).
Pressure & Leak Test
Turn on supply, check for drips, allow tank to fill fully before use.
Tip: Most users can handle DIY installation in 1–2 hours; consider professionals if you’re uncomfortable with plumbing.
5. Maintenance & Tips
Task Frequency
- Sediment & Carbon Filters Every 6–12 months
- RO Membrane Every 2–3 years
- Sanitize System Annually
- Check Storage Tank Pressure Every 6 months
Flush Before Use: After replacing filters or membrane, flush 2–3 tankfuls to remove manufacturing residues.
Monitor TDS: Use a TDS meter at the RO faucet to verify performance (ideal reading 20 ppm).
Conserve Water: Consider a permeate pump or a high-efficiency membrane to improve water-to-waste ratio.
6. FAQ
Q: Does RO remove beneficial minerals?
A: Yes—but many systems offer a remineralization stage to add calcium and magnesium back into the water.
Q: Is RO water acidic?
A: Reverse osmosis water can be slightly acidic (pH 5.5–6.5). Remineralizers or a post-alkalizing filter can balance pH.
Q: Can I connect an RO to my refrigerator?
A: Yes—many RO kits include adapters to feed an icemaker or water dispenser.
Q: How noisy is an RO system?
A: Routine operation is quiet; you’ll only hear water filling the tank or occasional faucet flow.
Bottom Line
A reverse osmosis system is a reliable, high-performance solution for providing pure, safe drinking water right at your tap. By understanding how it works, what to look for, and how to maintain it, you’ll ensure years of clean, great-tasting water for your household.